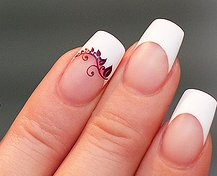
Purple Flower Water Marble | Nail Art Tutorial

I prefer swatching marbles on paper rather than a fake nail because I get more of the design & can then decide which part(s) I want on my nail when I do my manicure. This is what I do before almost every water marble to test how colors work and what base to use.
►Nail polish and products used◄
-Base coat (of your choice)
-OPI – Silver Canvas: http://amzn.to/1Wd6k1p
-Revlon – Holographic Pearls: http://amzn.to/1K5MoNF
-OPI – Black Onyx: http://amzn.to/1hpCWXZ
-OPI – Purple Perspective: http://amzn.to/1Wd6k1p
-Seche Vite Fast Dry Top Coat: http://amzn.to/1K9HQUE
-5 oz paper cup: http://amzn.to/1MFYfk5
-Room temperature filtered water
-Orange stick: http://amzn.to/1U20nmV (or your choice of sharp tool)
-(Optional) Liquid Latex: http://amzn.to/1JsI9JL or Tape: http://amzn.to/1MFXQyc
►Step-by-Step◄
-Start out with clean, dry nails and apply a base coat
-Apply one coat of Silver Canvas followed by one coat of Holographic Pearls as your base color
-(Optional) Prep around your nails with liquid latex or tape
-In your cup create a bullseye with Black Onyx, Purple Perspective and Silver Canvas
-Draw in a flower design with your orange stick
-Carefully dip in your nail(s), then slowly pull out
-Remove protection if used and clean up around the edges
-Finish with a top coat!


 January 16, 2016


Follow Us!